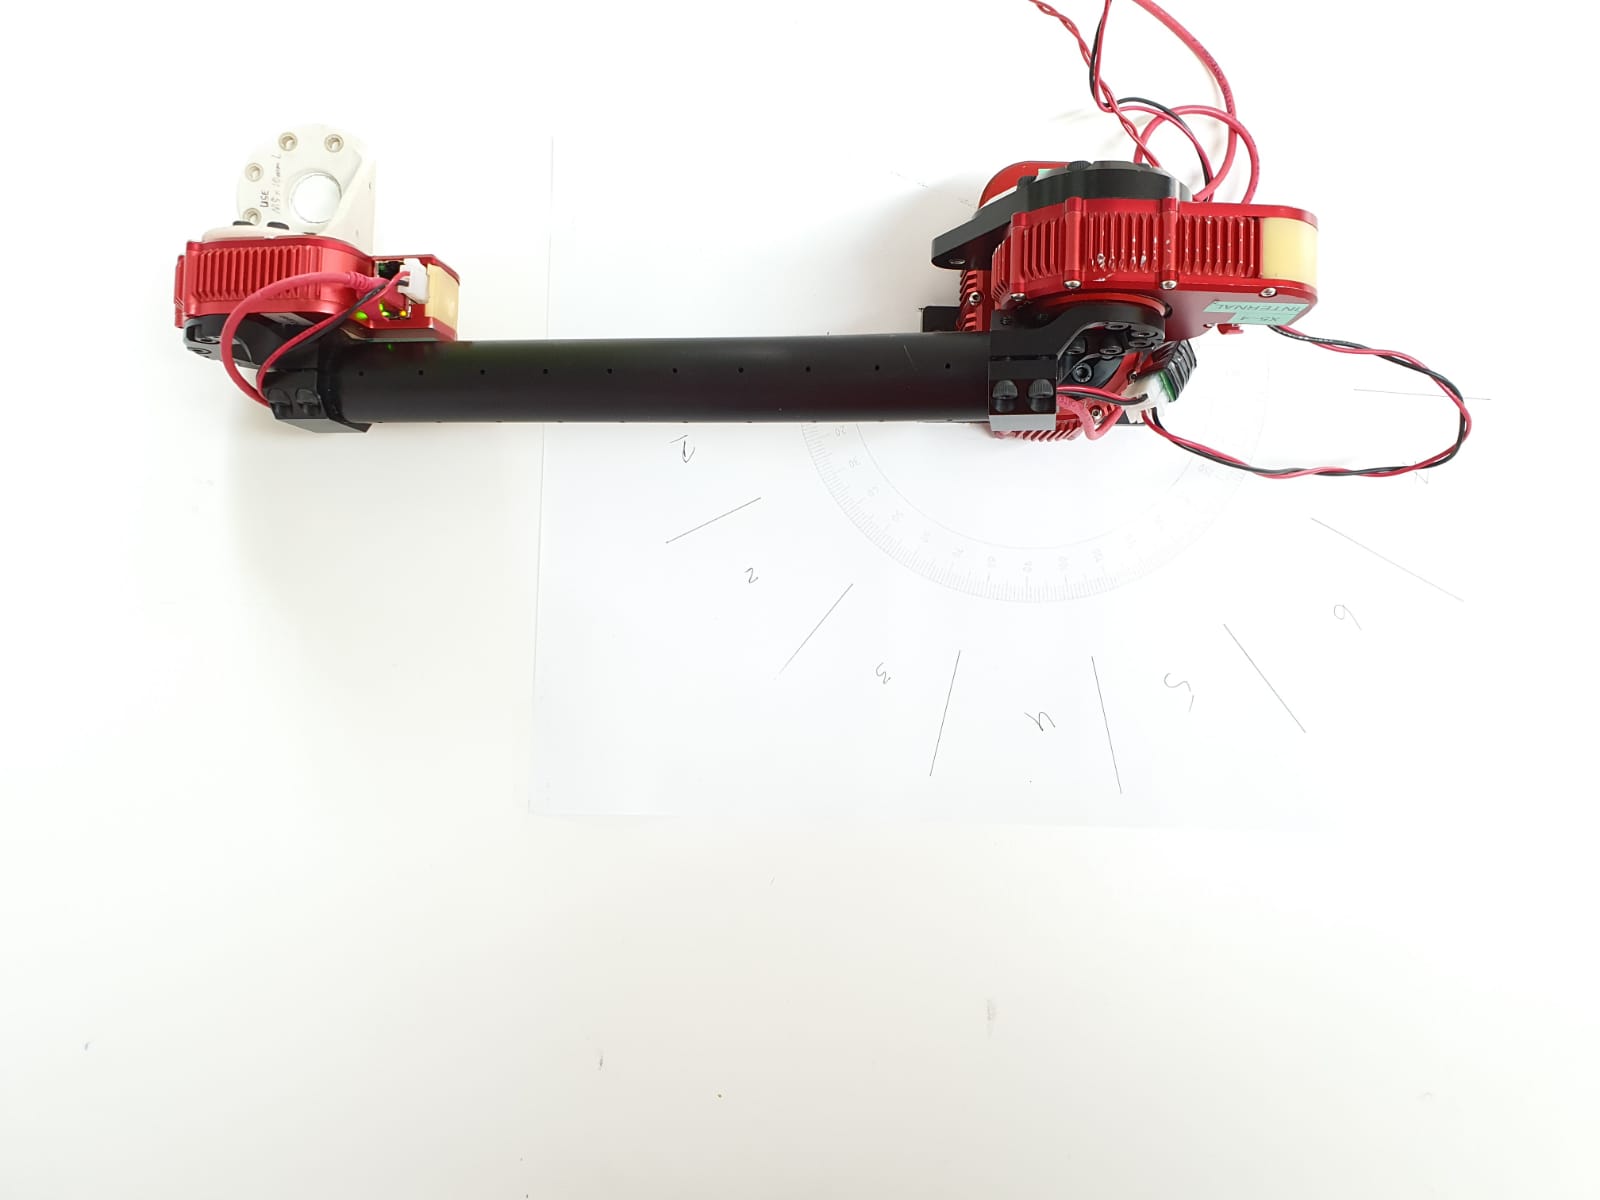
Today we are publishing a review with a little bit of a guide on Hebi Robotics (https://www.hebirobotics.com/) X series actuators. A 3 dof arm is reviewed in this guide. The actuators used in the arm are:
- Base: X8
- Shoulder: X5
- Elbow: X5
The industrial standard actuators are quite light and modular but much powerful. For example the maximum power of X8-16 is 38 N-m with weight of just 490g. Several sensing capabilities are already integrated in the actuaros like: Accelerometer/Gyro, temperature and voltage. The actuators support different [programming langauges](https://www.hebirobotics.com/apis) on different platform as well such as: C/C++, C#, Python, ROS, MATLAB and mobile apps. A single unit is a full package with a motor and its driver with several sensing capabilities. One of the best feature of Hebi Robotics X Series actuators is its ease of use. You just connect the module to internet via a lan cable and its ready to use.
Robot Setup
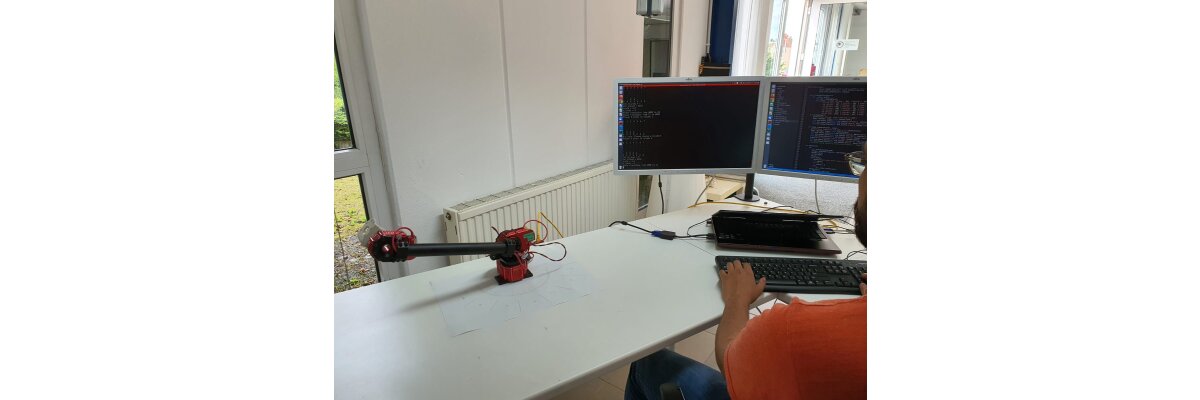
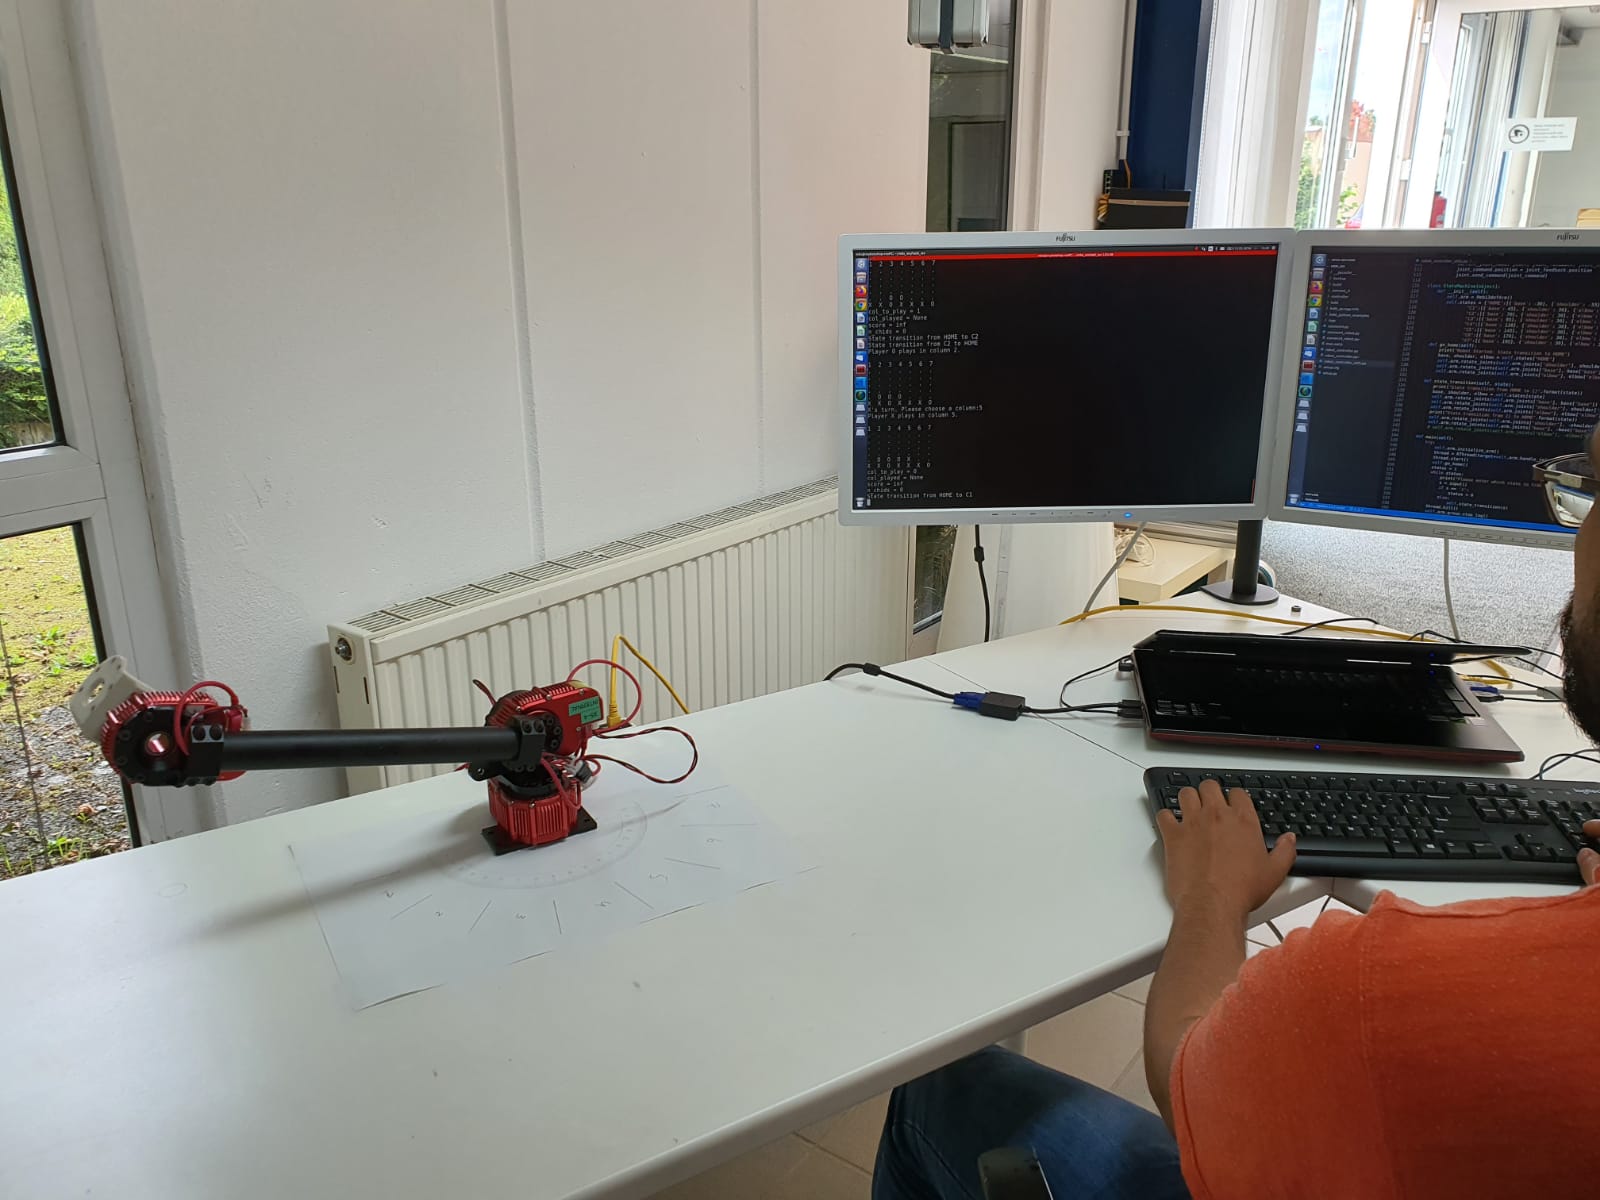
This time I decided to play a small game with the 3dof of arm. The robot is mounted on a table and it can reach around 30 cm and is restricted to move in 180° plane. Connect 4 game is being played with the robot. It is a connection board game for 2 players. The players can choose a color discs and can start dropping in the columns. The discs fall down straight, occupying the latest available space. The first player can always win the game with suitable moves. For this human is always given preference to start. To make the robot intelligent a small program is used which uses adverserial search algorithm Minimax(play with the robot and see it let's you win or not ;-)). A 6x7 board is defined for the game. 180° robot configuration space is divided into 7 distinct parts with 25° each. 2.5° is left at the start i.e. at 0° and also at 180°. That means for collumn one its area will be between 2.5° to 27.5° and in the same way the last column 7 is from 152.5° to 177.5°. A home position is defined for the robot which actually is in 4 quadrant. For any move the robot defines its trajectory to the respected space between 1-7, rotates its wrist 360°(just to confirm its turn) and goes back to its home position.
Arm Controller Arm controller in the setup is also modular. Connect 4 and arm controller, both can be used seperately and ofcourse together. In arm controller two classes are defined Hebi3dofArm and StateMachine . Hebi3dofArm class is responsible for motor initialization and control. rotate_joints function can be used to rotate the joint by giving the name of the actuator and angle to rotate to. On the other hand StateMachine class is responsible for whole arm movement. This class defines a small finite state machine with 8 states including home and 1 to 7 columns in the game board. The states are calculated from the home position of the robot to the center of any column i.e. for column 1 base joint the angle would be 30 + 2.5 + 12.5 and for shoulder and elbow any angle can be defined.
The StateMachine class has a few useful functions like go_home (send the robot to home state defined in states) and state_transition function moves to the robot arm to the specified state. Currently the behaviour of state machine is to go back to home position after a transition to some state. Here more complex behaviours can be added.
"HOME":[{'base': -30}, {'shoulder': -55}, {'elbow': 90}],
"C1":[{'base': 45}, {'shoulder': 30}, {'elbow': 365}]
"C2":[{'base': 70}, {'shoulder': 30}, {'elbow': 365}]
"C3":[{'base': 95}, {'shoulder': 30}, {'elbow': 365}]
"C4":[{'base': 120}, {'shoulder': 30}, {'elbow': 365}]
"C5":[{'base': 145}, {'shoulder': 30}, {'elbow': 365}]
"C6":[{'base': 170}, {'shoulder': 30}, {'elbow': 365}]
"C7":[{'base': 195}, {'shoulder': 30}, {'elbow': 365}]
Note: In current setup the shoulder is moving downwards in positive direction. Check yours and invert the sign if needed.
To run the arm controller alone run the following command:
$ python3 robot_controller.py

Connect 4
Connect 4 game has a few useful classes. The two important one here are discussed.
1. Player
Player is an abstract class which actually defines attirbutes and functions of players. Later two more classes Human and Minimax are defined. These two classes defines the behaviour of the both palyer in detail.
1. Game
Game class is the major class which actually run the game between two player mainly both humans or one one computer i.e. Minimax and a human.
To run the connect 4 game only, run the following the command:
$ python3 connect4.py
To run the connect 4 game and the robot together, execute the following the command:
$ python3 connect4_robot.py
Note: When running connect4 and robot together make sure to position the robot on 0° on the most right side.

ROS Interface
The hebiros (http://wiki.ros.org/hebiros) package is a powerful tool with several basic to advanced example. hebiros_node is the most basic node to manage the families of actuators in the system. Different groups and descriptions can be added at runtime. There are several nodes also provided to get the feedback, trajectory or kinematics. In adveanced modules the setup and the driving nodes are provided for mobile bases, MoveIt, Gazebo and RVIZ visualizations.