The MYBOTSHOP Raspberry Pi Dynamixel Servo Controllerboard (DSC) is, as the name already implies, developed to function as the controlling unit for Dynamixel servos via Raspberry Pi. The controllerboard is provided with a efficient AT644P-20AU uC, a integrated texas instruments tri state buffer for the half duplex interface aswell as an integrated step down module for all current consumptions. Additional information regarding the handling and first use can be found using the following links:
German Quick Start Guide
English Quick Start Guide
This post is mainly dedicated to the integration of the DSC with ROS (Robot Operatin System).
listing of needed components
Besides the MYBOTSHOP DSC there are also other components needed such as:
- Raspberry Pi or PC with FTDI UART USB Converter
- 7,4 - 11,1V Power supply (Power adapter or 2-3S Lipo Battery)
- Dynamixel Servomotor with Half Duplex Interface (e.g. AX12A, AX18A / Protocol 1.0)
- Dynamixel 3 Pin Cable / If used with the Dynamixel X-Series an adapter cable is needed
Software packages Download
All software packages can be found on both GitHub aswell as our Server. The repositories are divided in two main folder. The first folder contains every Arduino sided adaptation such as the integration of the DSC using Arduino IDE, aswell as the ROS firmware. The second folder contains the ROS Node. .
Both the Arduino and the ROS folder need to be downloaded and unzipped. The servo_board has to be unzipped under catkin_ws/src.
Preperation for the first usage
We reccomend all users to explicitly read our Quick Start Guide to prevent possible errors that can occure due to false handling. Please also take note of the hazard warnings that are mentioned in the Quick Start Guide.
Due to the fact, that usual computers do not have UART Interface we reccomend the usage of a FTDI converte wich can be connected to the computer using the pinbar of the DSC. If a Raspberry Pi is used the DSC only needs to be attached to the GPIO Header.
Arduino IDE
For the Uplaod of the Arduino Sketche (ROS Firmware) aswells as for compiling the required Arduino libraries it is necessary to have the complete Arduino IDE. Please download the packages via the Arduino Downloadsite and do not install them using the following command: apt-get install Arduino
If there is no Boardmanager after starting the Arduino IDE the installation of Arduino IDE was not right and have to be redone.
The following rosserial packages have to be installed to enable the communication between the Raspberry Pi / Computer and the MYBOTSHOP DSC
- sudo apt-get install ros-[VERSION]-rosserial-arduino
- sudo apt-get install ros-[VERSION]-rosserial
Creation of the workspace
- mkdir -p ~/catkin_ws/src
- cd ~/catkin_ws/src
- git clone https://www.github.com/ros-drivers/rosserial.git
- cd
- catkin_make
the following commands generate the Arduino library
- cd Sketchbook
/libraries - rm -rf ros_lib
- rosrun rosserial_arduino make_libraries.py .
If all of the steps that are listed above have been done all arrangements are completed to integrate the MYBOTSHOP Dynamixel Servo Controllerboard (DSC) into Arduino IDE, compile the ROS Firmware and to upload. To see how the integration, compiling and uploading are done read the Quick Start Guide.
ROS Node
To compile and starte the DSC ROS package unzip the ROS package under catkin_ws/src and upload it.
- cd catkin_ws
- catkin_make
Now the DSC is fully funtionable and the Dynamixel servos can be attached..
If ROS was not applied during the starting routine it has to be started using roscore. The Following command show the performance spectrum:
- roslaunch servo_board dsc.launch //Starts ROS Node and, dependent on the version, builds up the UART connetcion
- rosrun rosserial_python serial_node.py /dev/ttyAMA0 // Dependent on the version that is used the connetion has to be build up using the following command
- rostiopic list // Showcases the full range of commands and functions
- rostopic echo /mydata //Shows the position, temperature and the voltage of attached servos
- rostopic hz /mydata //shows the execution time of the subscriber
- rostopic /j1/command std_msgs/Float64 [Position] // selects the servos

As visualized in the screenshot above the paramete transmission is done with 9 to 10Hz.
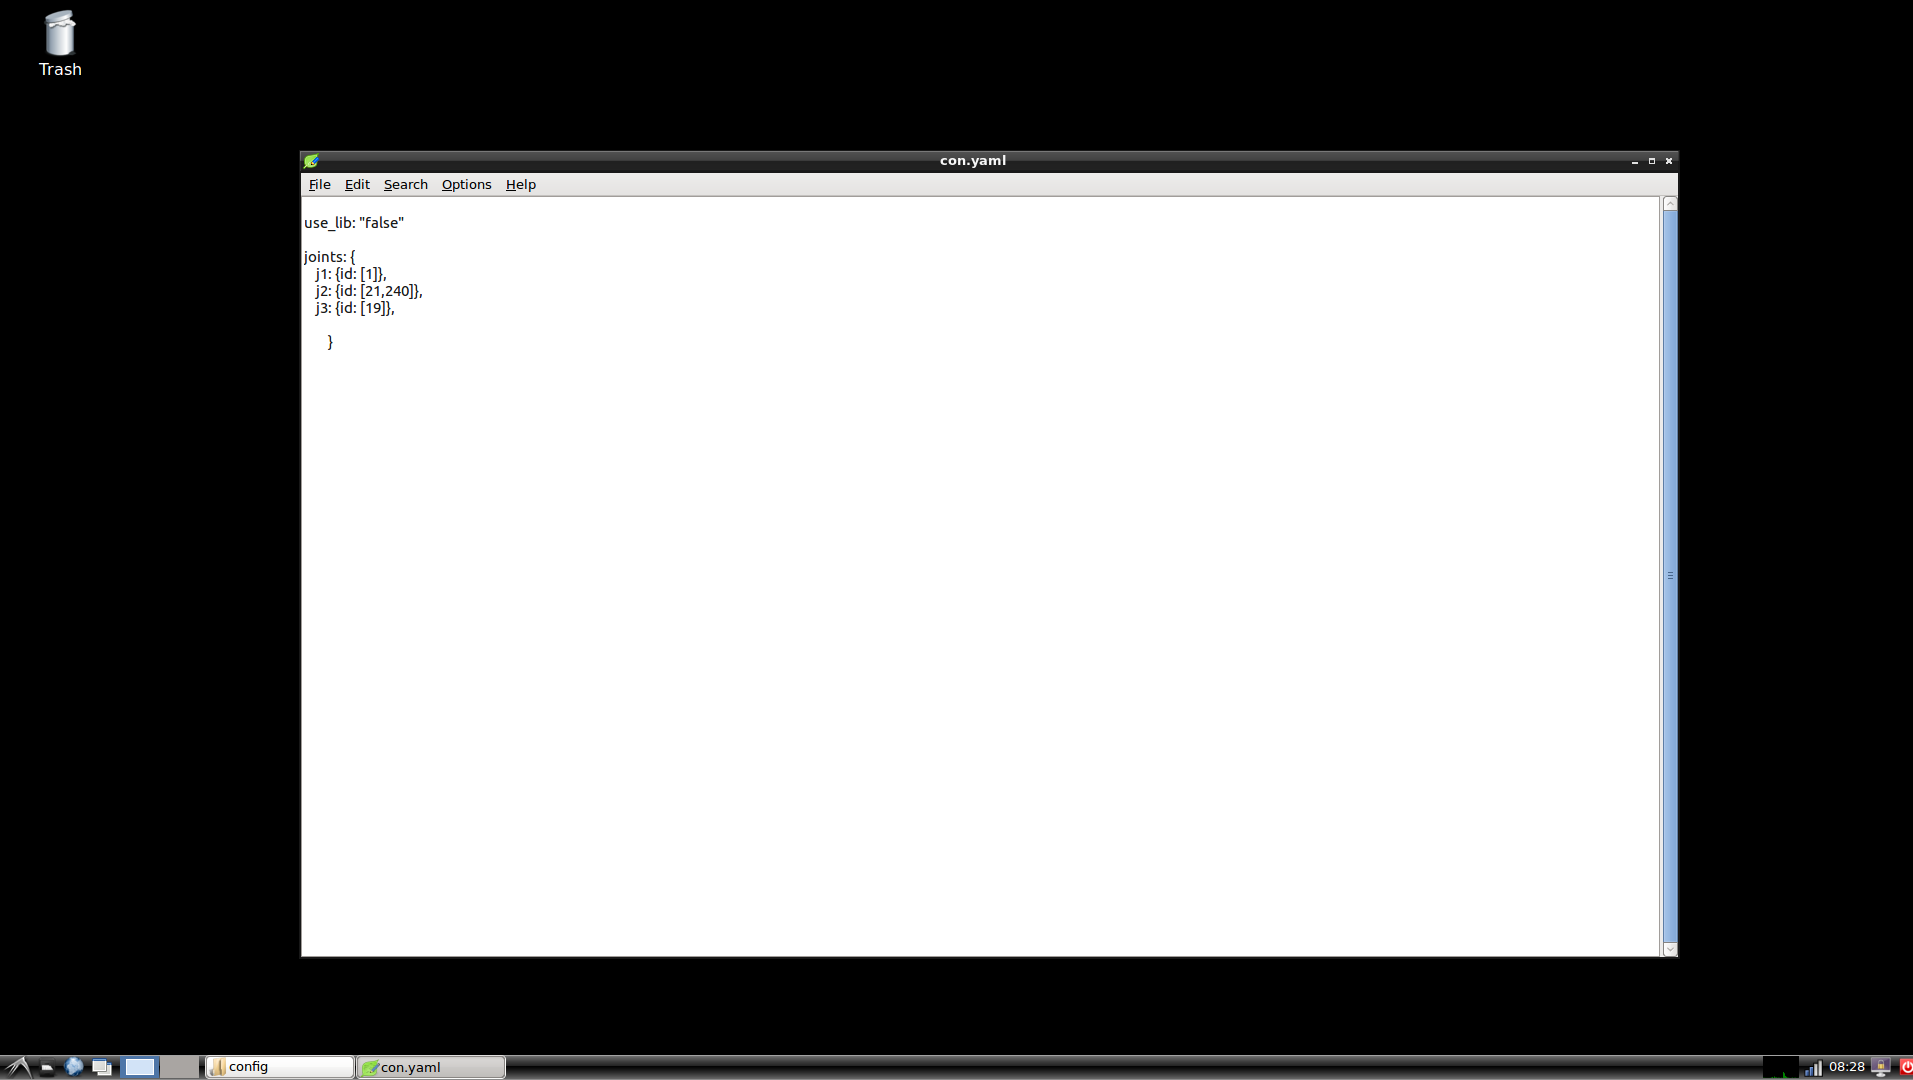
Config/Con.yaml
Another special featue of our DSC if compared with the DYNAMIXEL controller is our config file (servo_board/config/con.yaml) wich allows it to divide every servo in groups, wich can be seen in the following screenshot. In the screenshot there were three different classed created (j1,j2,j3) the names of the different classes can individually be adapted.
Every class has a different servo assigned to it. The number of assigned servos can be adapted to fit to the indivduall usage.
Furthermore the config file runs the line: use_lib: "false" wich allows the communication using our node. If u want to programm or use a different node the function has to be set on true: use_lib: "true"